PRACTICAL IMAGE EDITING
A Real Portrait Watermark Cleanup: Upload, Review and Download
The before-and-after photos and editor screenshots in this walkthrough were supplied by an actual user. The input and downloaded JPEG are both 1776 × 874 pixels.
Published 2026-10-14 · Updated

Start with the marked portrait
The repeated SAMPLE labels, diagonal dashes and small crosses extend across the face, yellow-tinted glasses, hair and background. The output above gives you a full-image view of the cleaned portrait; the input below makes it easy to see where the marks originally crossed important details.

1. Open the photo in the watermark editor
Open the watermark remover and choose Upload image, or drop an image you own or have permission to edit. Choose a supported JPG, PNG or still WebP and follow the size message on the page. Your working image opens in the editor.
For this workflow, go to Automatic cleanup trial. Find text remains available for selecting individual words when you want a smaller manual edit. Whole-image automatic cleanup can process the repeated letters and graphic marks together.
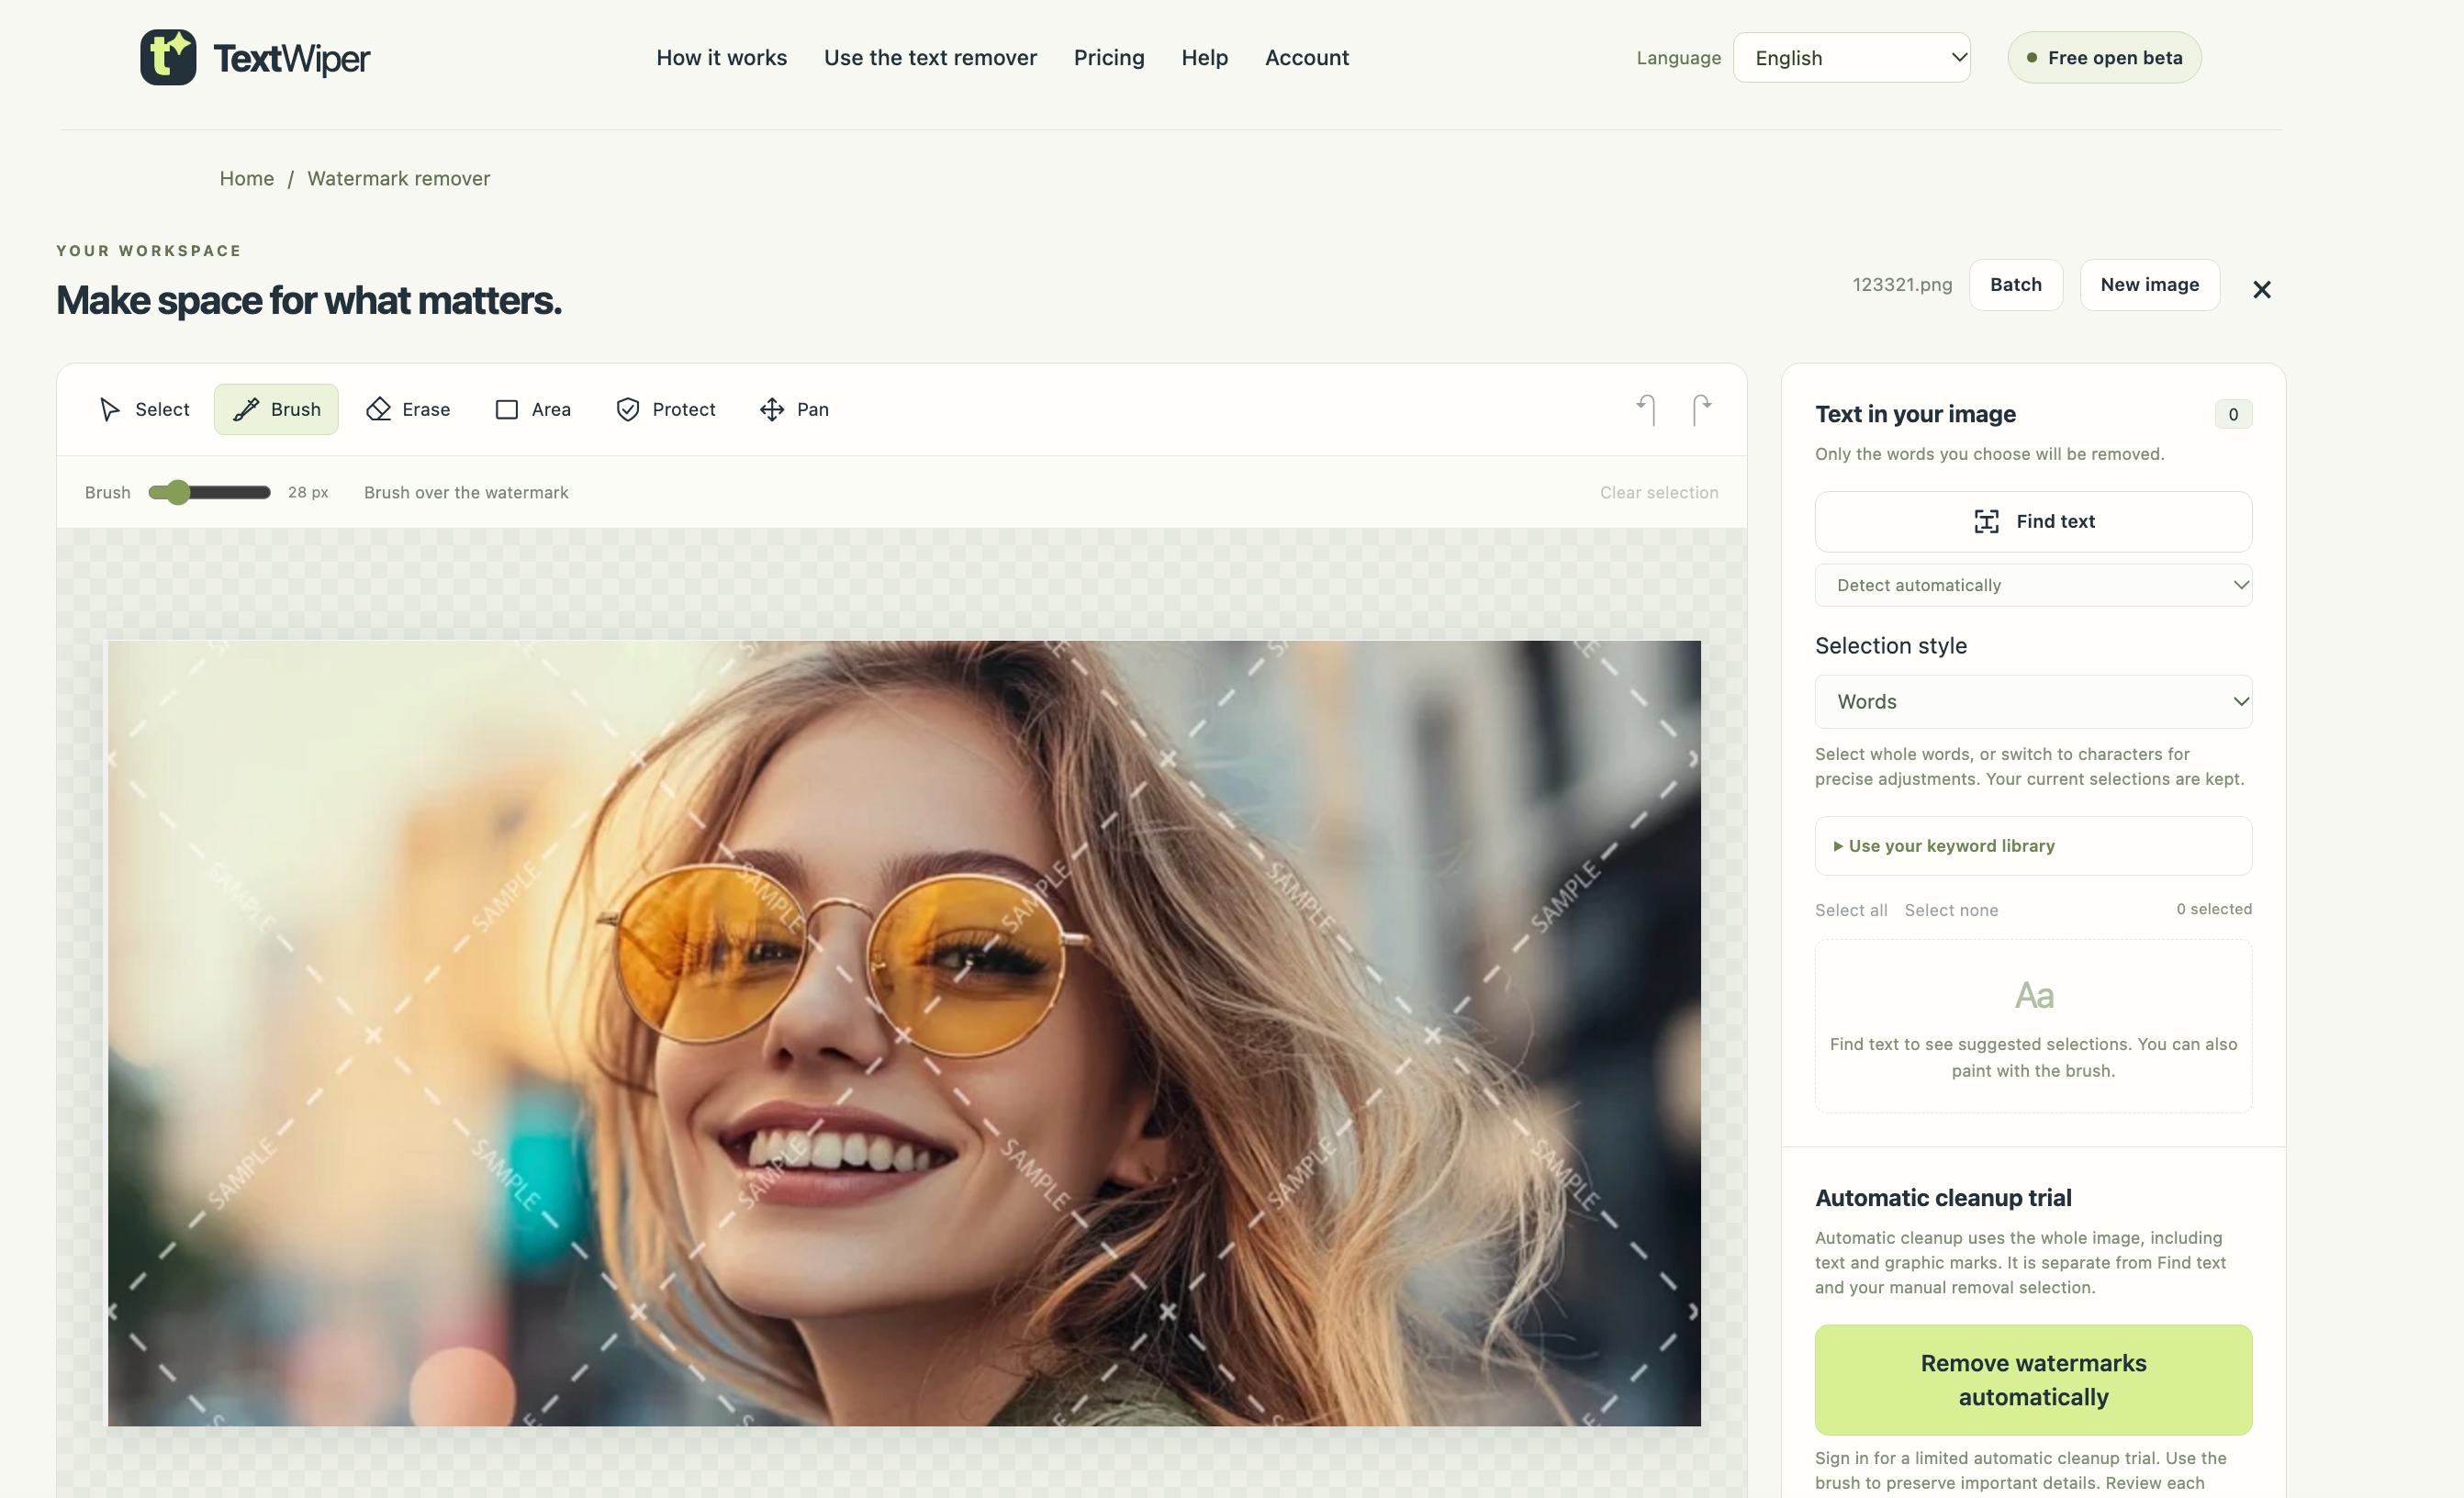
2. Sign in with Google or an email account
Open Account and sign in with Google or your TextWiper email account. For a first Google sign-in with an email that has no TextWiper account, confirmation creates the account. If your email already has one, sign in with its existing password first, then choose Connect Google. Keep the recovery code privately when registering an email account.
Return to the same photo and read the Automatic cleanup trial status. This is a limited trial: availability follows the allowance and service status shown on the page. You can continue with the manual tools when the automatic option is unavailable.
3. Approve the whole-image upload explicitly
Choose Remove watermarks automatically, read the separate permission message and explicitly confirm the whole-image upload when you agree. This sends the working image for automatic processing. Loading a photo locally and signing in are separate steps.
Automatic cleanup uses the whole working image, including text and graphic marks. A manual removal selection belongs to the manual repair workflow, so review the entire automatic result when it is ready.
4. Follow the existing task instead of submitting again
Submit once, keep the editing tab open and follow the status for that attempt. If the page offers Check existing cleanup, use it to check the same task. When a response is slow or its status is uncertain, check the existing attempt before considering another submission.
An accepted attempt uses trial allowance even if processing fails or you stop waiting. Waiting for the current status helps avoid spending allowance on a repeated submission.
5. Inspect the complete result, especially facial detail
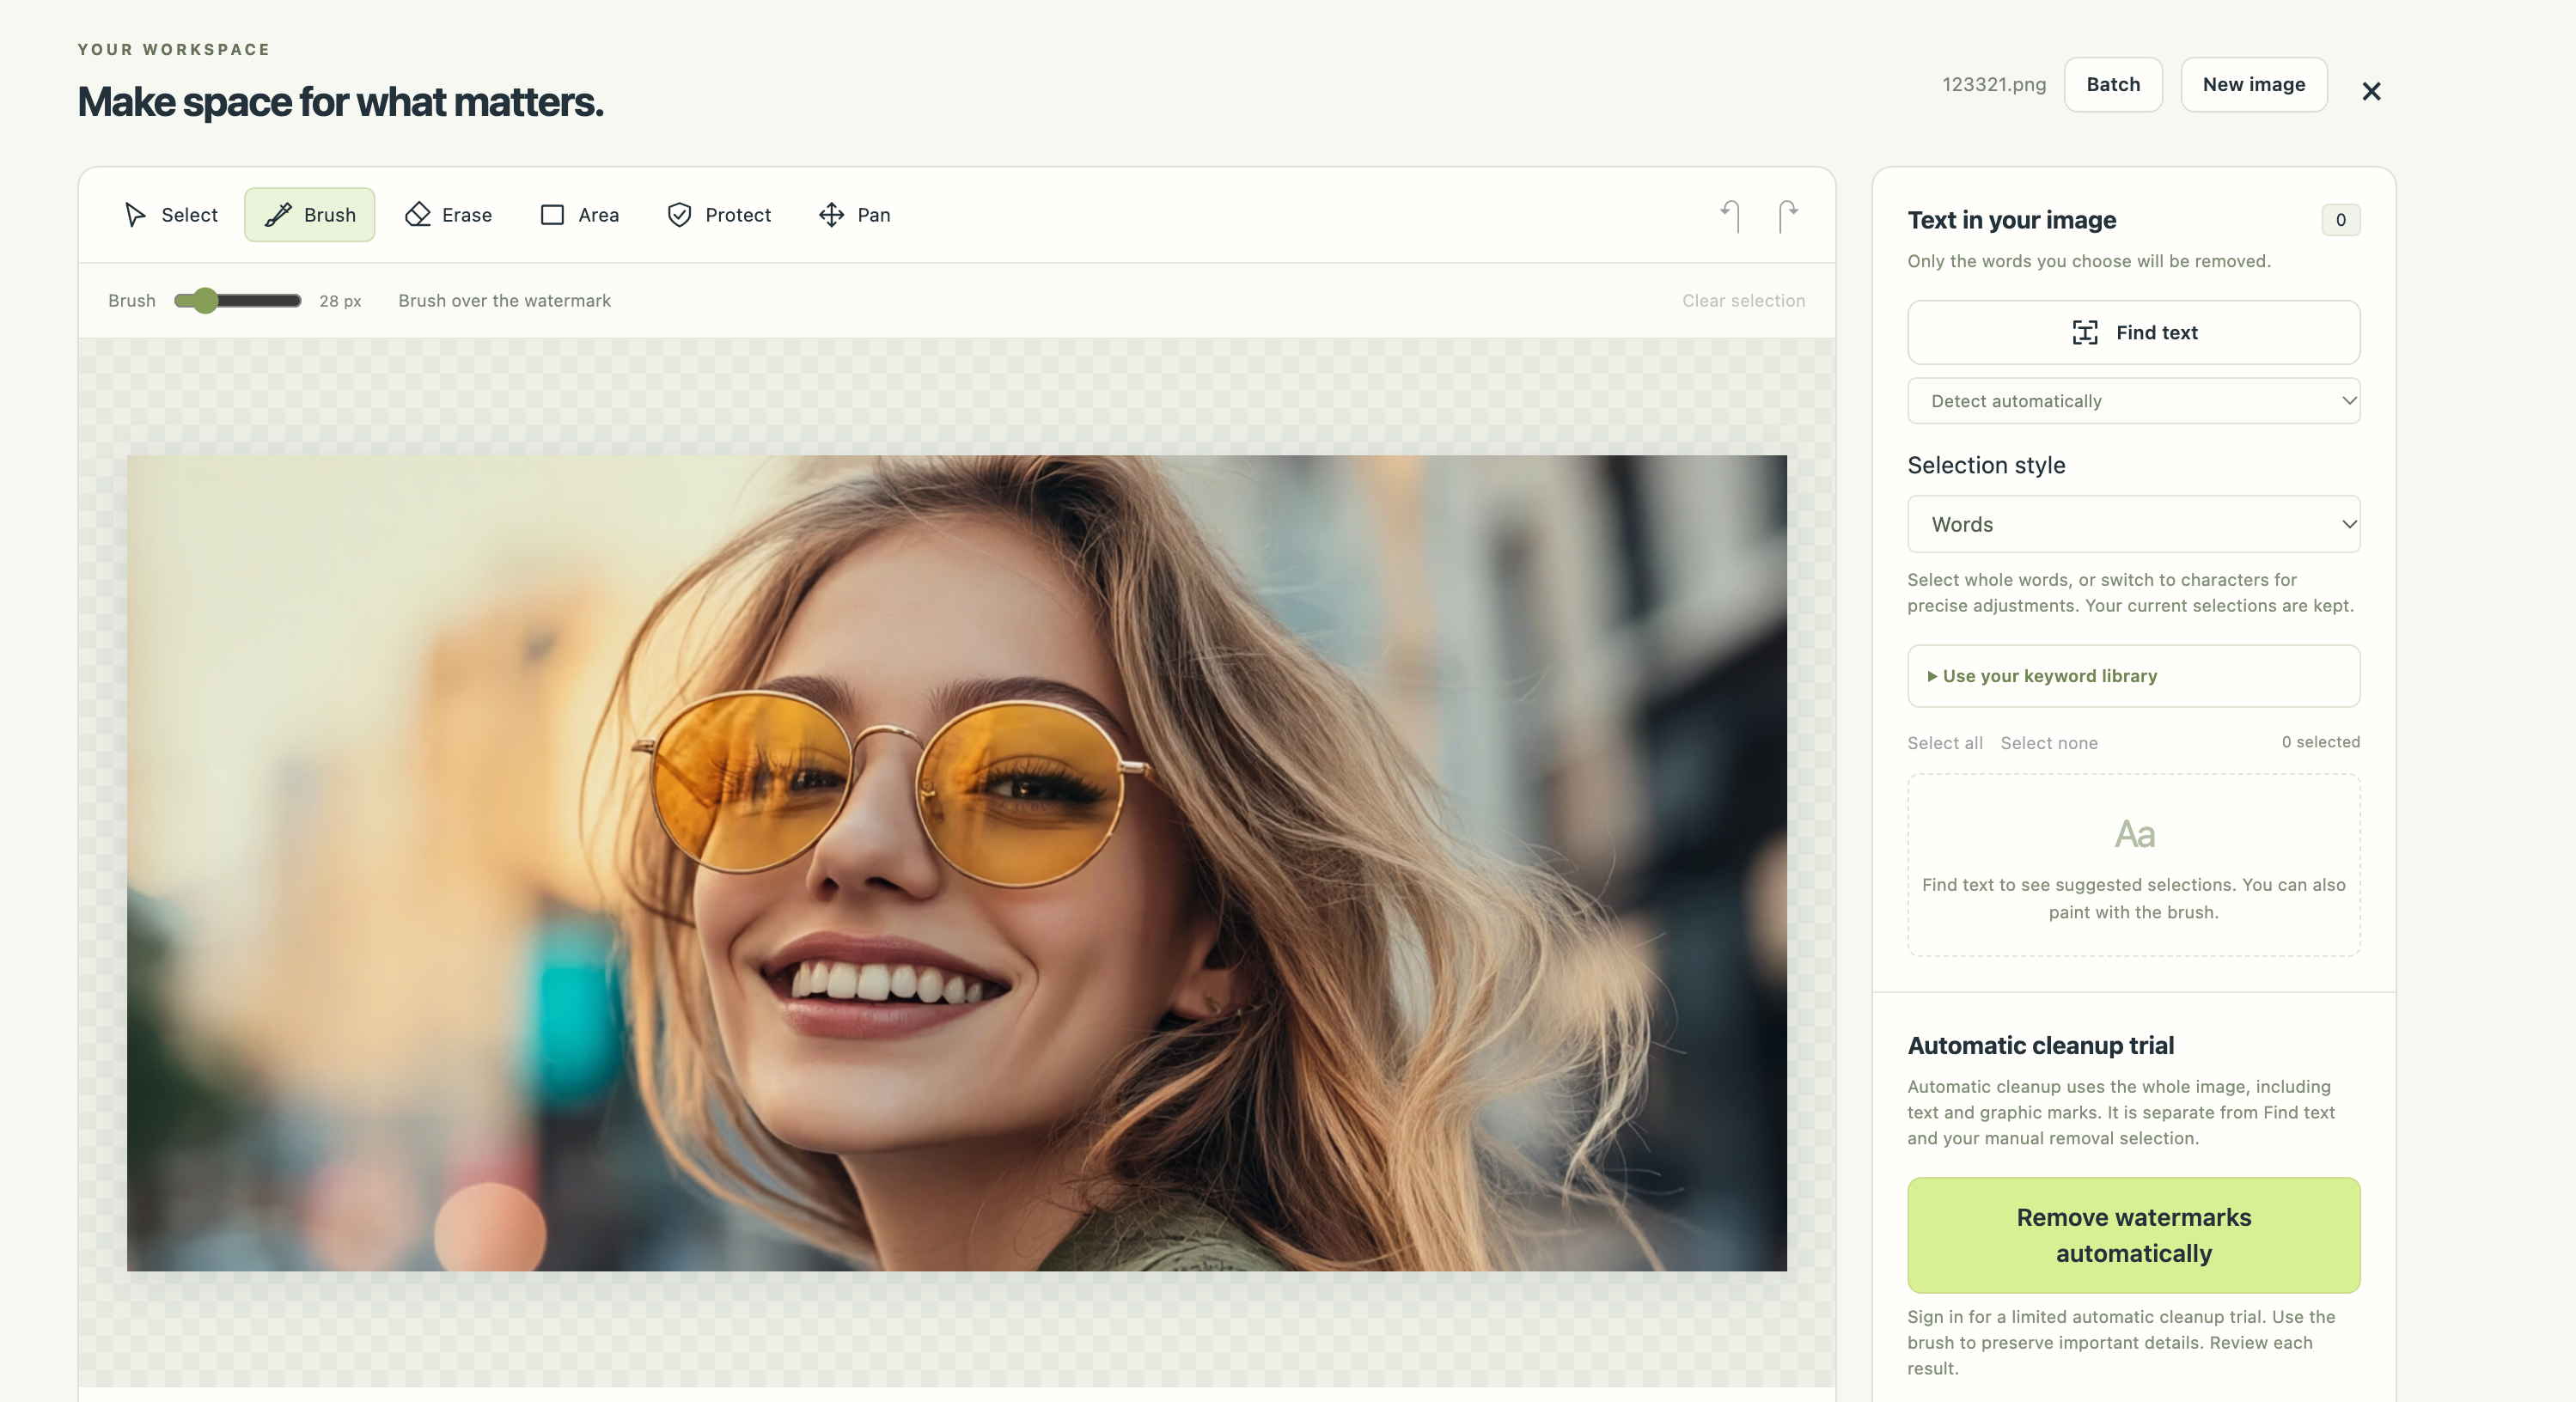
Inspect the complete output after processing. Use Show comparison when you want to look back at the input, then return to the full result. The screenshot below shows the processed portrait in the editor.
At 100% zoom, check tooth edges and gaps, eyelashes, reflections in the lenses, fine hair strands and skin sharpness. Cleanup reconstructs covered details, so compare these areas with the original and decide whether the result suits your intended use.
6. Download the format you need, then reopen the file
Choose PNG or JPG after reviewing the result. PNG avoids an additional lossy JPEG encoding step; JPG re-encodes the picture and flattens any transparency onto white. This case's actual download is the 1776 × 874 JPEG shown above.
Reopen your downloaded file, check its dimensions and inspect the face, hair and background once more. Keep both the original and the edited copy so you can choose the version that works for your next use.